Monday, March 2, 2015

DET Chapter 6

Norman pointed out that the good design evolves and “the design is tested, problem areas are discovered and modified, and then it is continually retested and remodified until time, energy, and resources run out.” (142)  He explains that designers work to improve the products created so the experience the user has with the product is better or at least different.  Later on, he says once the product is satisfactory, to change it would be unnecessary. After reading this chapter, I realized if I go into product creating, I would always look for ways to improve a product or how something is done but I also have to learn the limit. I would have to figure out when it stops being worth changing. To create innovations that are unnecessary for the public, even if they are more efficient (like the Dvorak keyboard Norman discussed), would be unwise. The innovation created must be worth the effort to adjust to change and in some cases, it will not be worth the effort.

When creating a product, Norman points out people tend to prioritize one aspect of the products they make while downgrading the rest. Some people place aesthetics over usability and cost/ease of manufacture. Others place usability first (something I would probably do) and some place the best cost/ease of manufacture as their priority.  It is important to keep in mind, when we are creating the products for the athletes at CRI, all factors must be treated as equally important.


Finally, another important topic he brings up is projecting our own ideas and our place in the design making and product using process. He says, “We tend to project our own rationalizations and beliefs onto the actions and beliefs of others.” (155) This concept is extremely important to remember because as a group of able-bodied designers who are creating products for athletes whose bodies do not work completely like ours do, we have to really ask and consider what they need. We do not know best but hopefully we can learn to the best of our capabilities. There is a difference in being an expert on the device and an expert on the task. Obviously, when we create the device we become an expert on how it works but it is important to see if the task of the device is carried out the way the user wants it, not how we imagined it to be.  

Sunday, March 1, 2015

Interesting Adaptive Technologies

1. Blade Runners

(http://www.standard.co.uk/olympics/olympic-news/running-on-blades-the-role-of-technology-in-paralympics-8104167.html )

These blades were created for running and sprinting for for those without the bottom of their leg and their feet. No two blades were ever the same because they are designed specifically for people of different heights. "Made from 80 layers of carbon fibre, each thinner than a human hair, today’s blades store kinetic energy from the wearer’s steps as potential energy, like a spring, allowing the wearer to run and jump." It is even used by athletes in races.

2.  Racing Wheelchair

(http://www.sportaid.com/invacare-top-end-eliminator-osr-standard.html?gclid=CISb1qLliMQCFdAF7AodvBUABw)

This wheelchair has stability, stiffness, cornering traction,adjustable handlebar bar-ends to ensure that the rider can go at maximum speed and still stay stable. Products like these can empower people to know that they can still participate in rigorous competition without how their body is difference from those who are fully able-bodied becoming an impediment.


3.  Mono Ski

These adaptive skis make it possible for those who want to enjoy the rush of the zooming through the mountains. It is simple in creation and innovation but very helpful. It is described as a nordic ski sit with a quick attach and comes with frames that are custom built for people of all sizes and disabilities. 

(http://www.tetonsitski.com/index_files/SitSkiPage.html)

CRI Questions Part 2

As Stephanie and I were trying address the issues faced by the athletes with the adaptive rowing technologies, we stumbled upon some inquiries that were left unanswered from our first visit.

For the expert
  1. What is the system of storage and organization at the moment?
  2. How are the oars placed into the old design of the oar carrier and how are they placed with the rider now?
  3. Can we go over the attachment process of the one handle erg?
For the rower
  1. What difficulties do you face when trying to access the materials for rowing? Can you demonstrate for us?
  2. What method do you use to carry the ergs now?
  3. In the process of getting the oars and getting onto the the docks, when do you need assistance from someone else?

3 ideas

On a beautiful winter morning, Stephanie and I sat down to discuss our goals and desires in regards to the issues faced by the adaptive rowing community that  we would like to tackle.

The first issue we wanted to tackle was the mechanisms used to carry the oars. We started off by brainstorming ways that we could make to easier to hold the oars for wheelchair riders as they are making their way from storage to the docks.

Our Ideas:
Key
                         i.      Pouch/Crutch Carrier
                         ii.      Attachment for standing oars
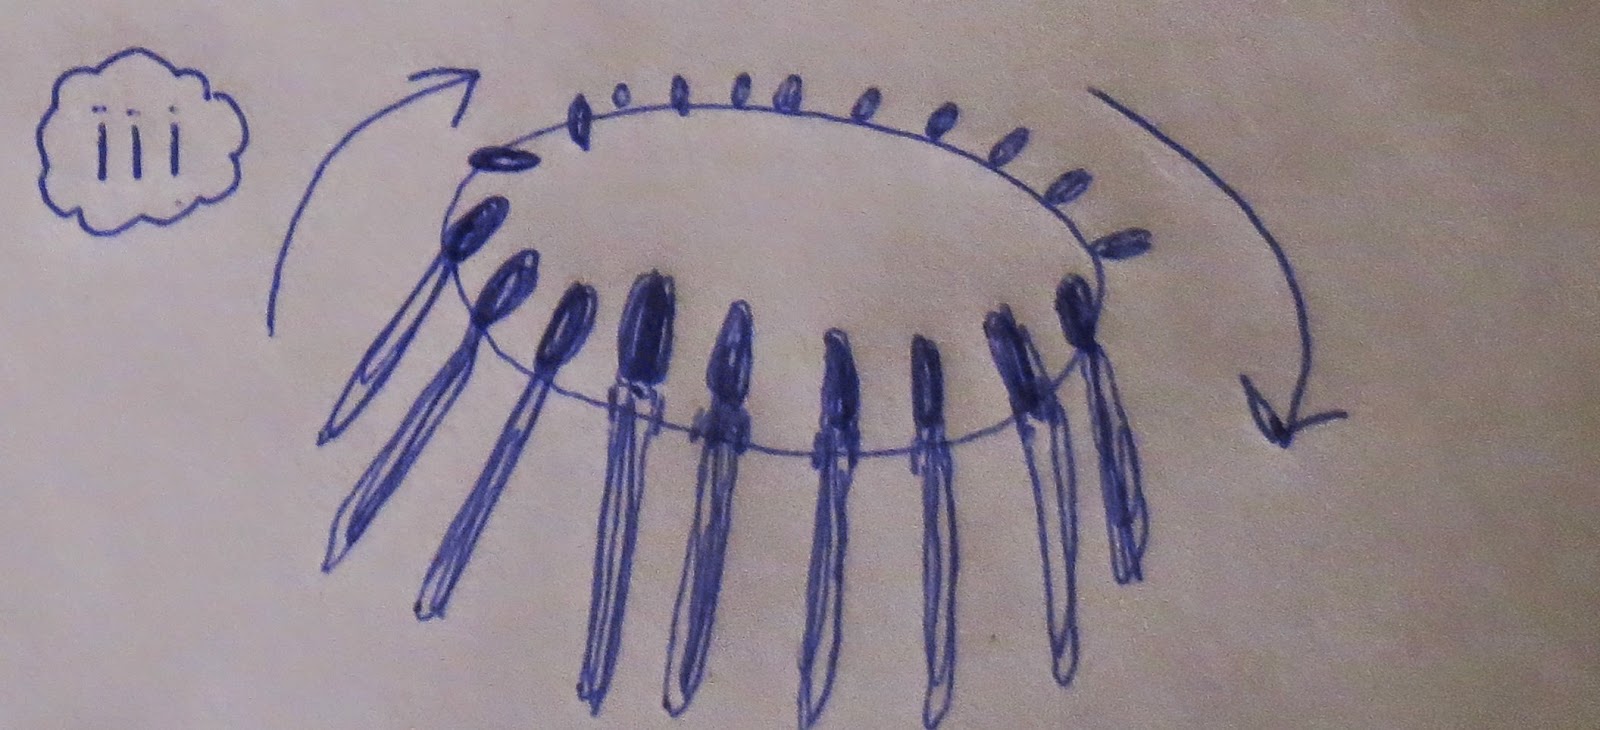
                         iii.      Attachment on arm rest
                         iv.      Swinging side attachment


To evaluate which creation we would most like to make carrying oars easier and a more independent activity, we made a pugh chart.


The next issue we could see ourselves tackling is the one with oar storage and accessibility.

Our Ideas:
Key
                                                            i.      Diagonal Storage
                                                           ii.      Oar Popper 2.0
                                                          iii.      Oar Bookshelf
                                                          iv.      Revolving Oar Holder
                                       v.      Storage-to-wheelchair back attachment 


To evaluate which creation we would most like to make oar storage and accessibility easy, we made a pugh chart.  


The last issue we thought we might want to work with is attaching the single-hand erg.

Our Ideas
Key
      i.      Two to One Erg Handle
                                                ii.      Bar + Bolt (Similar to pantoon attachment)
                                               iii.      Magnets and Strap Attachment


To evaluate which creation we would most like to make single-hand ergs easier to attach, we made a pugh chart.

Friday, February 20, 2015

CRI First Visit

      As the title suggests, we took our first trip to meet the people who work and participate in the CRI program. While there, I learned two very important things.

1.  There were three different groupings mentioned in terms of creating and using equipment for people who are have disabled. There is equipment made for leg, trunks, and arm. There is equipment for trunk and arms usage. And the last one is the spinal and arm usage. The community tries to fit the needs of all the people who come in but I forgot to ask what people who are impaired in hearing do when directions are being shouted out to athletes.

2. The goal of the program is to give a means to be as independent as possible. One challenge to their independence is set up which requires the help of an able-bodied person. Another challenge is that means of access and storage are extremely difficult to work through by yourself and needing the help of others takes away from your independence.

The young woman who showed us around explained and demonstrated a lot of setbacks that they are facing; some issues are easy to fix (like covering hard seating with duck tape and foam) and others were almost uncontrollable (like the movement of the water. Our role is to create or improve upon the products that will give the athletes the most independence with the best safety and of course ensuring the most fun.

Monday, February 16, 2015

Community Rowing Questions

For Rower

  • What brought you to rowing/CRI?
  • What is your favorite thing about the rowing community?
  • What is the difference between erging and rowing?
  • Do you prefer individual or group rowing?
    • If you do group rowing, how is it organized for people of different disabilities?
  • What is the easiest part of the getting into water? The hardest part? Why?
  • How long have you been rowing?
    • If for more than a year:How has the technology related to rowing changed since you began rowing?
  • Are you using anything to help you row? If so, what is it and how does it help?
  • What was your most interesting experience you faced while in the water? What was the scariest?
For Expert
  • What is the history  of CRI? When did they start?
  • How do you help deaf people with directions when rowing?
  • What is the greatest hurdle during the learning?

Milk Frother Disassembly

As a person who has broken many things in her lifetime, I know the consequences are never good. I went from breaking plates to toys and in school, I had to be very meticulous in classes involving lab because breaking apart of any sort would "ruin my life." However in today's class, we were told to let go of all guilt that came with the breaking of items and break open and disassemble a milk frother (if you don't know what it is, don't worry we were on the same boat. )

This is the $2.49 milk frother from Ikea.
The function of the milk frother is to spin its circular end to shake the milk and make it bubbly (or in other words-froth). 
Milk Frother in action 
Aerial view of result
Result: The milk came out beautifully and frothy in a matter of seconds.
The strengths of the product was that it only took a few seconds to complete its job. It was simple, light in weight, and didn't need to come with an instruction manual. It was also extremely cheap, $2.50, so if it ever broke, it wouldn't be the worst thing in the world. A weakness was that it almost resembled a toy which could actually break any second if it fell or was thrown. 

Although I had never used a frother before, I think this one worked really well because it only took a few seconds to make the milk frothy and it stayed frothed for about an hour. The affordances of the frother were that anyone could easily lift it, it could stand by itself and the user could use it to froth any milk (even chocolate, yum!). The signifiers and mapping were on point. You knew the switch would make it spin on and off. The batteries also showed how to open and which way to place them. The feedback was the spinning of the rod and vibrating noises made when the frother was turned on.

                                             
After making chocolate milk and frothing it (sorry, no picture evidence because result was consumed right away), we began the disassembly process. Some grunt work and pliers were necessary but the frother was broken down into its pieces to make this masterpiece.


Since the item costs $2.50, the price of all the items could not have cost more than $.50 and when I estimated all the costs of the parts, it came out to be $.46 which is a reasonable estimate. 

Before disassembling the frother, I thought it would be a very intricate machine with a million circuits inside but it turns out that it can be simple if you take the time to take apart an item and see the work that goes into making it. 

There were two higher end devices that were heavier, sturdier, more powerful, and faster than the Ikea one. However, they were a lot more expensive. I would go for the Ikea frother because it works really well and since I do not see myself ever really needing it, I would not spend extra money for it.